First, obviously, you'll need to pick your image. Make sure it's a good, big size, but not too big. Anywhere from 200px to 600px, width and/or height, should be good.
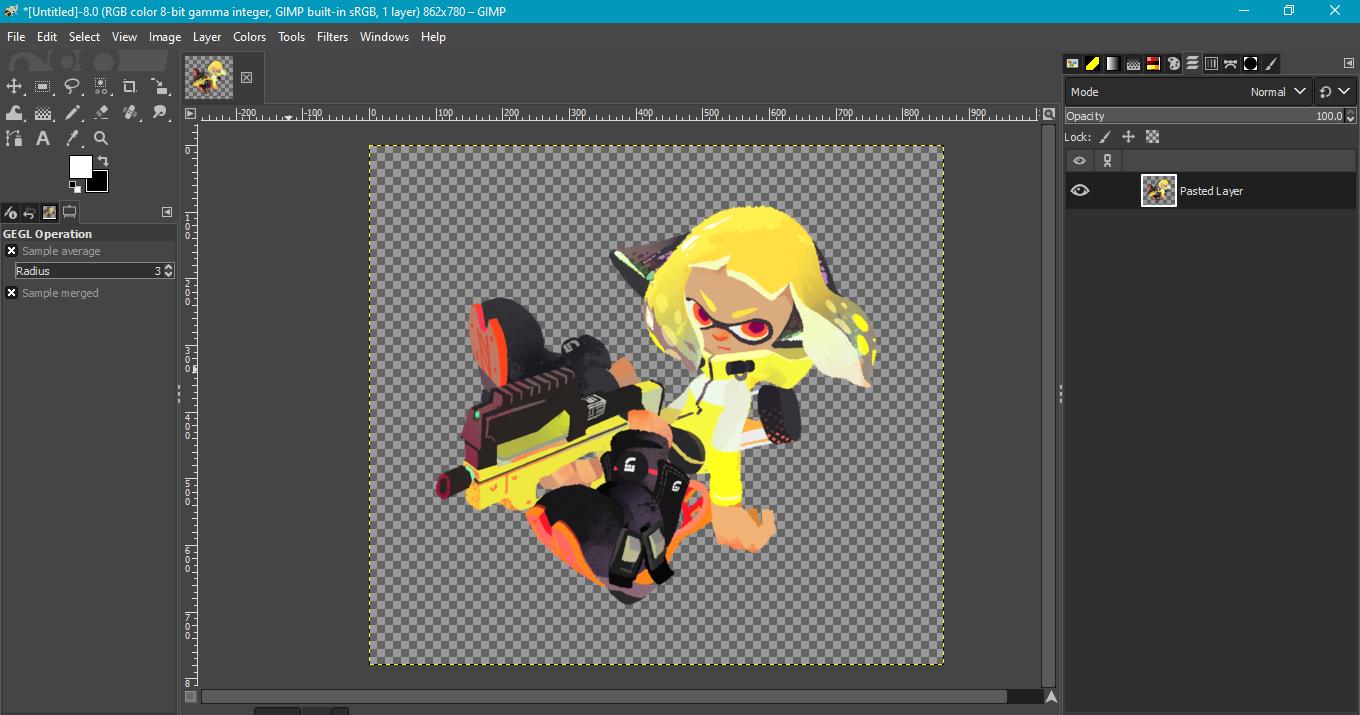
Load the image into your favorite editing program, I'll be using GiMP. Make some space around your image.
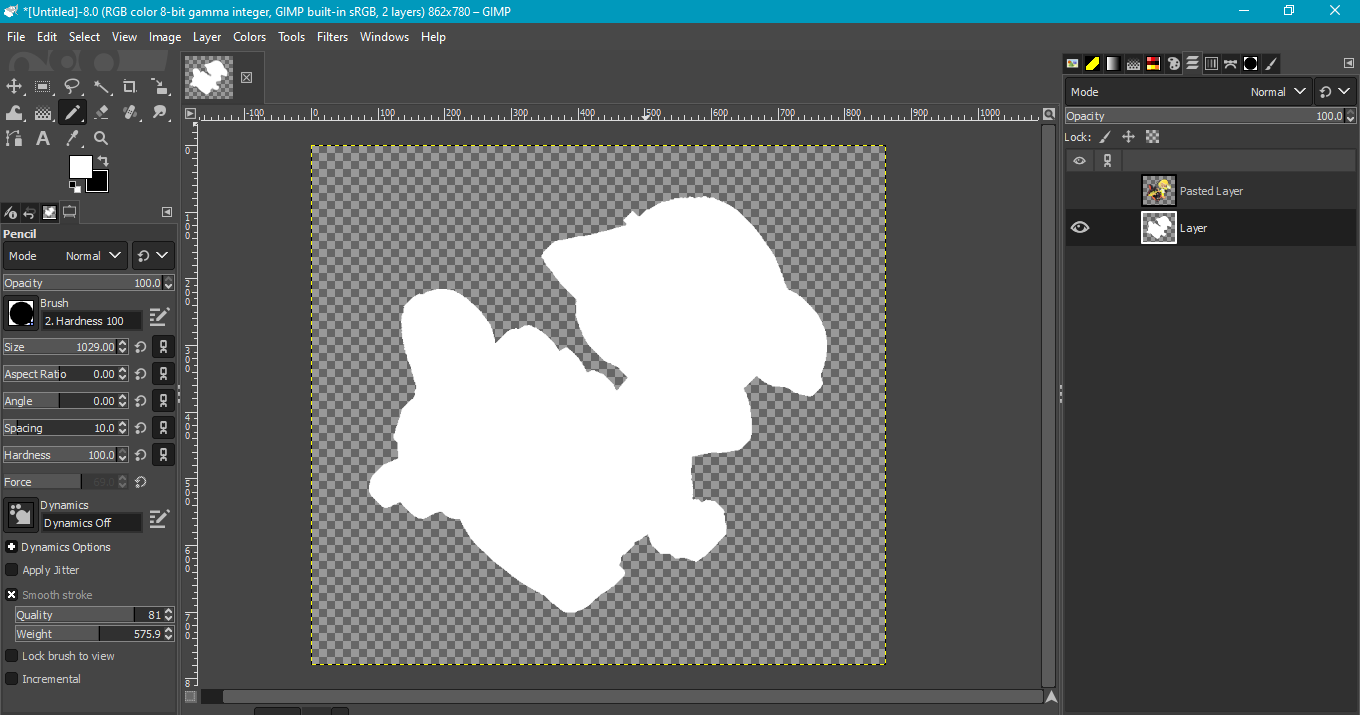
Hit Ctrl+A to select all of the canvas, then use the magic wand tool to unselect all the empty space. Make an outline around your image on a separate layer, 20px should be enough. Fill in the outline and merge your layers together.
Next, use the Newsprint filter, or whatever equivilant is on your program. And use these settings.
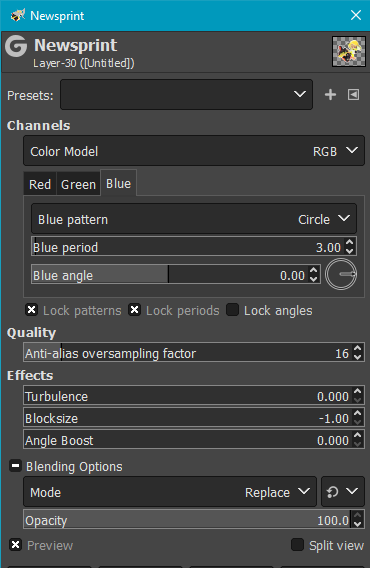
You can play around with them a little, but these are the ones that worked for me.
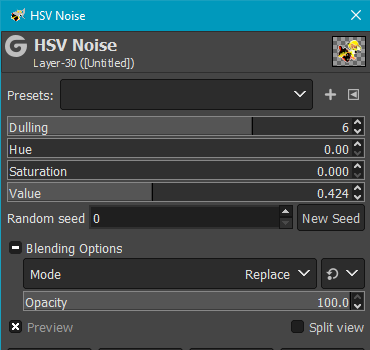
Next, add some HSV noise. Not too much, but just enough to give it that paper-like texture.
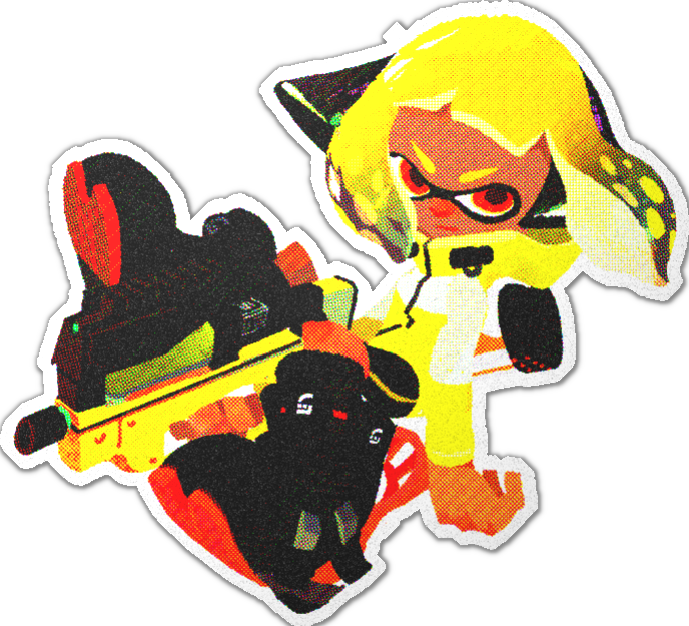
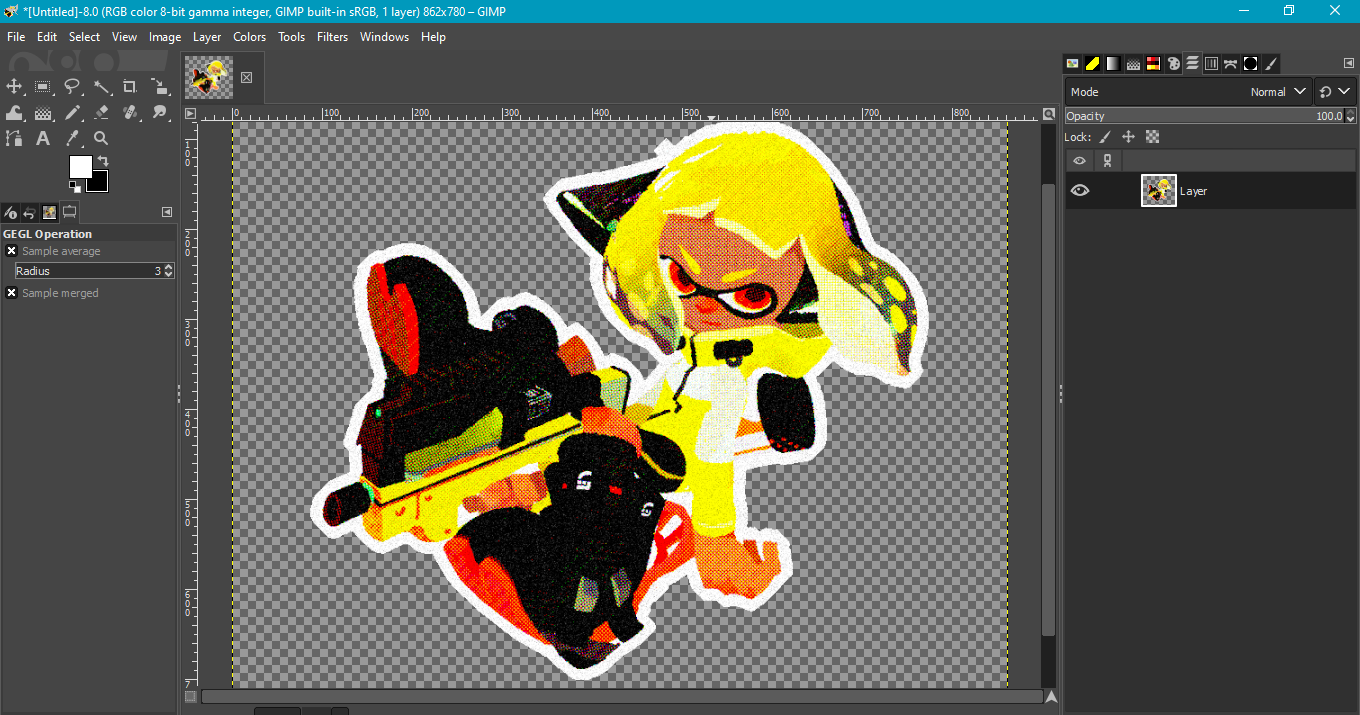
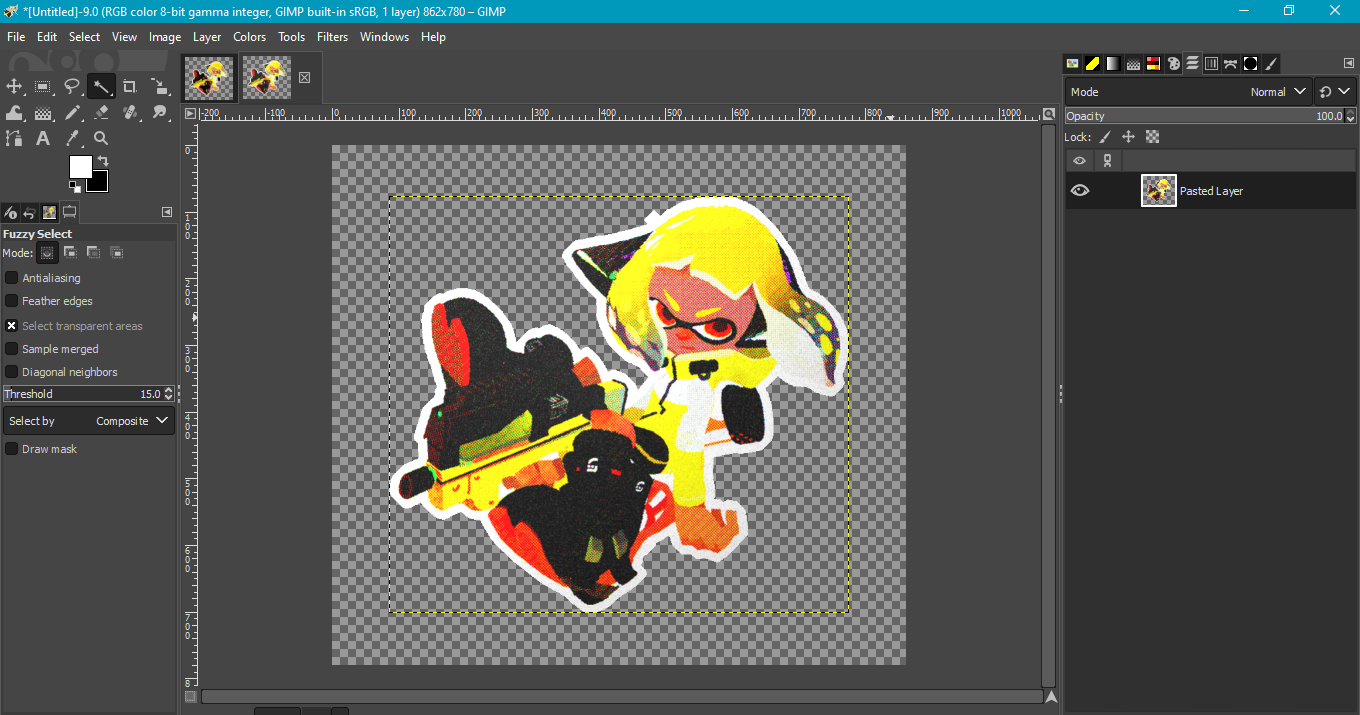
Your image should now look close to this.
Next, open up the lighting effects. You don't have to do this part, but it gives it a bit of realism, like it was scanned into the computer.
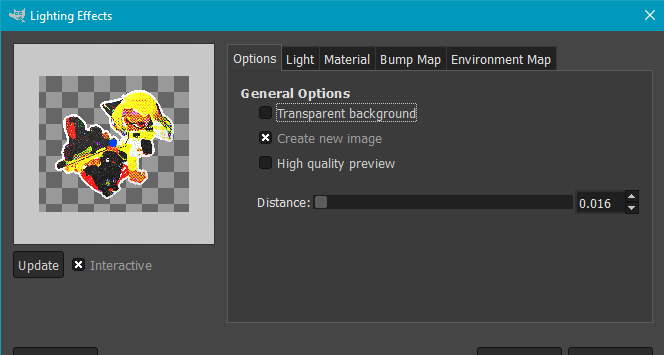
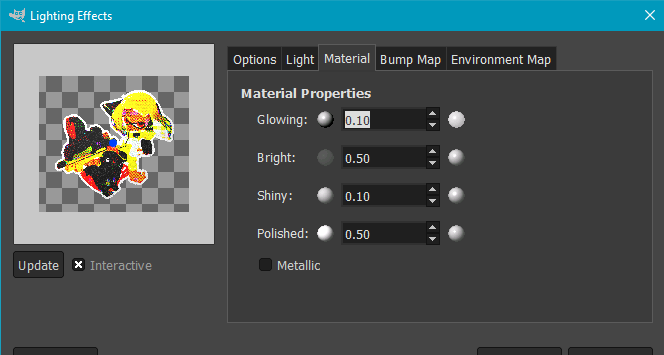
Again, you don't have to use these exact settings. Play around with how it looks, and when you're satisfied hit Apply.
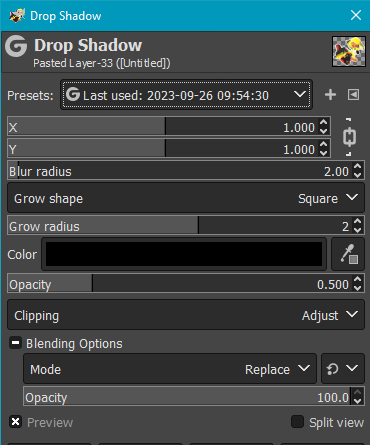
Now, you should add a little blurring to the image to complete the vintage look. Along with a dropshadow, if you want.
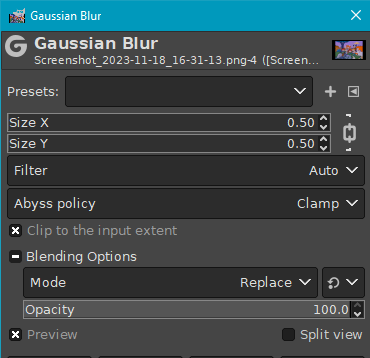
Anywhere from 0.50 to 1.00 should be good.
And with that, your sticker is complete!